In this post I will describe how I configured static website hosting using Amazon S3 with custom domain, secured website using https, and also configured redirects from naked domain to www and protocol redirects from http to https.
As result user can request the following URLs:
- http://adragunov.com
- http://www.adragunov.com
- https://adragunov.com
- https://www.adragunov.com
And every time ends up at:
- https://www.adragunov.com
Step 1: Get certificate.
First of all you need to get https certificate (it’s free!). Go to AWS Console and open Certificate Manager.
IMPORTANT: Switch region and create certificate in
US East (N. Virginia) (us-east-1)region, otherwise it will not be available in CloudFront.


Enter both naked domain and also wildcard subdomain.

Next choose DNS validation as validation method. As the domain is already registered in Route 53, this is the simplest validation option.

Expand the domain name and click Create record in Route 53. This will automatically create CNAME records in Route 53 and the domain will be verified.


Few minutes later certificate will change status from Pending validation to Issued.

Step 2: Configure S3 buckets
Next you need to create a S3 bucket to host static website.
Go to AWS Console and open Amazon S3. Click Create bucket.

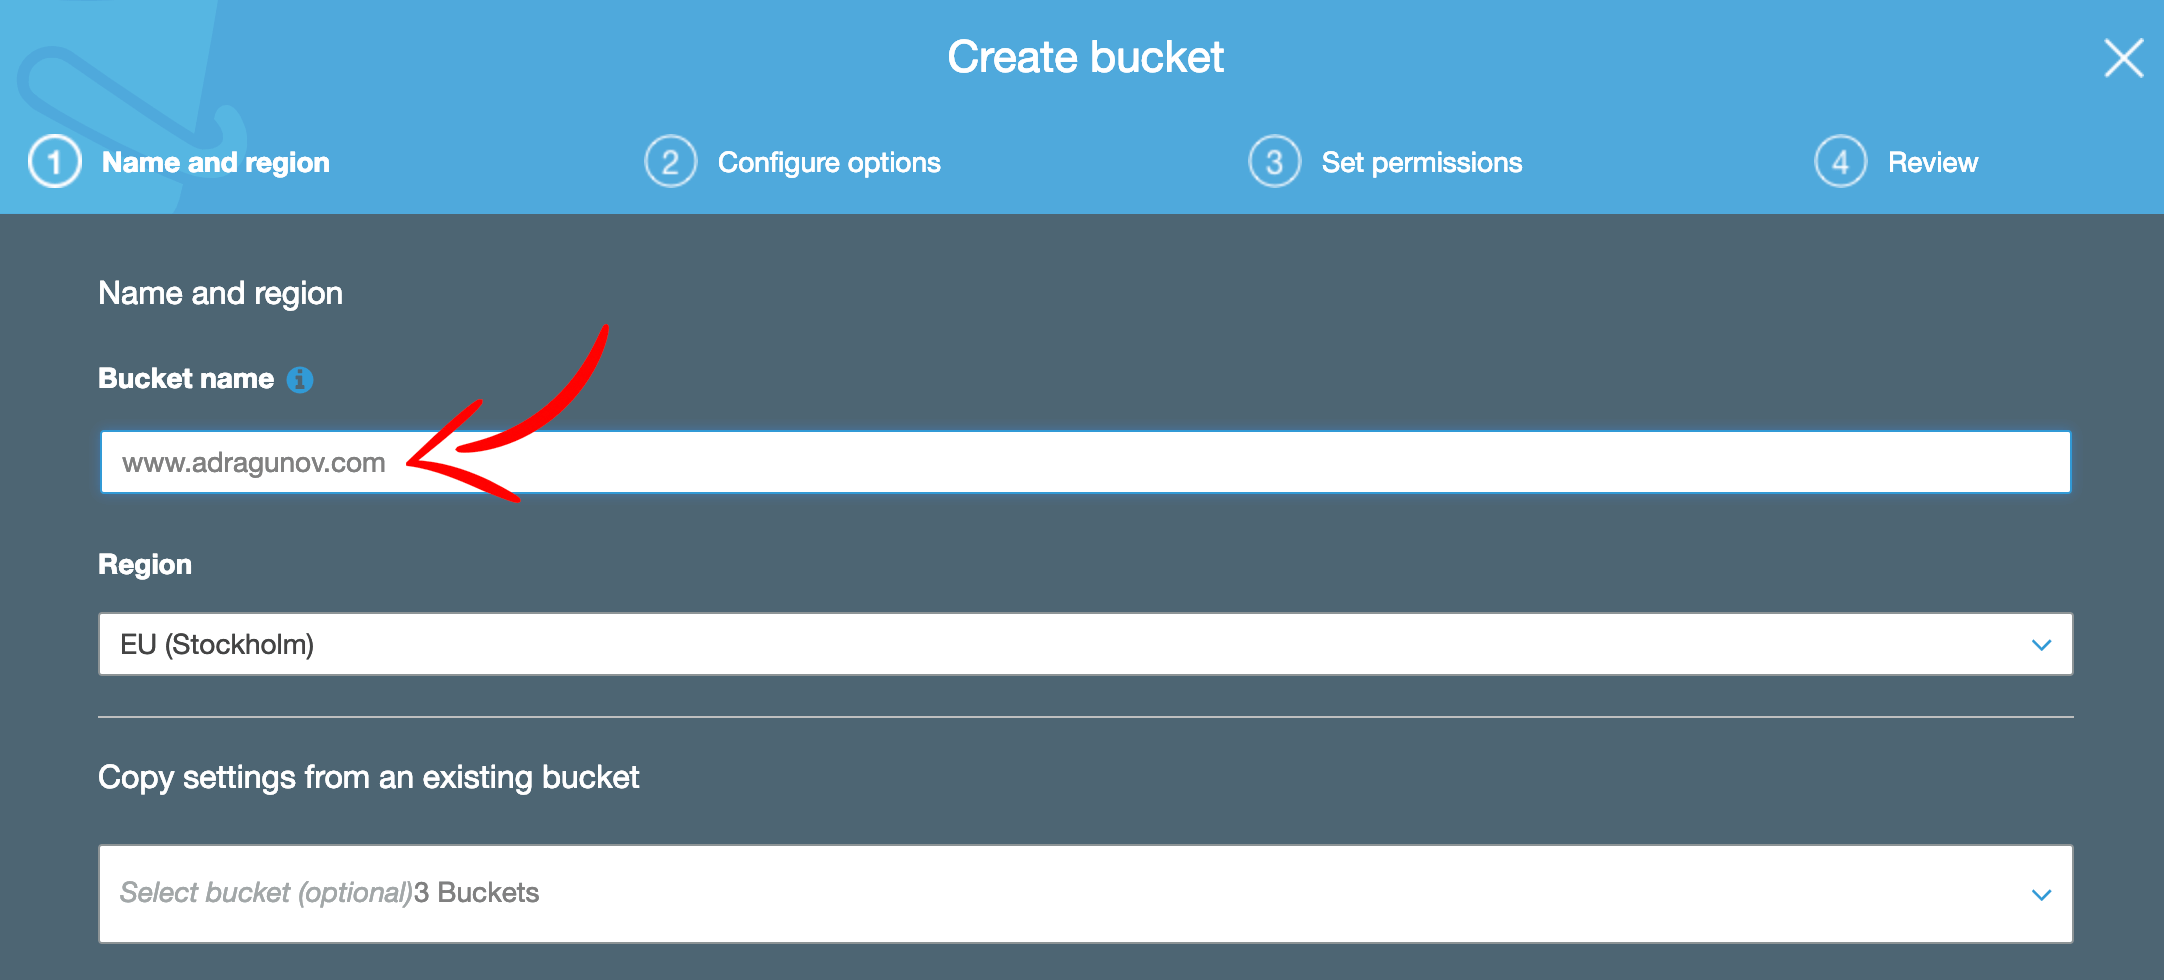
Choose domain name with www prefix as bucket name, in my case www.adragunov.com. This bucket will contain all static assets like html pages, styles and images.
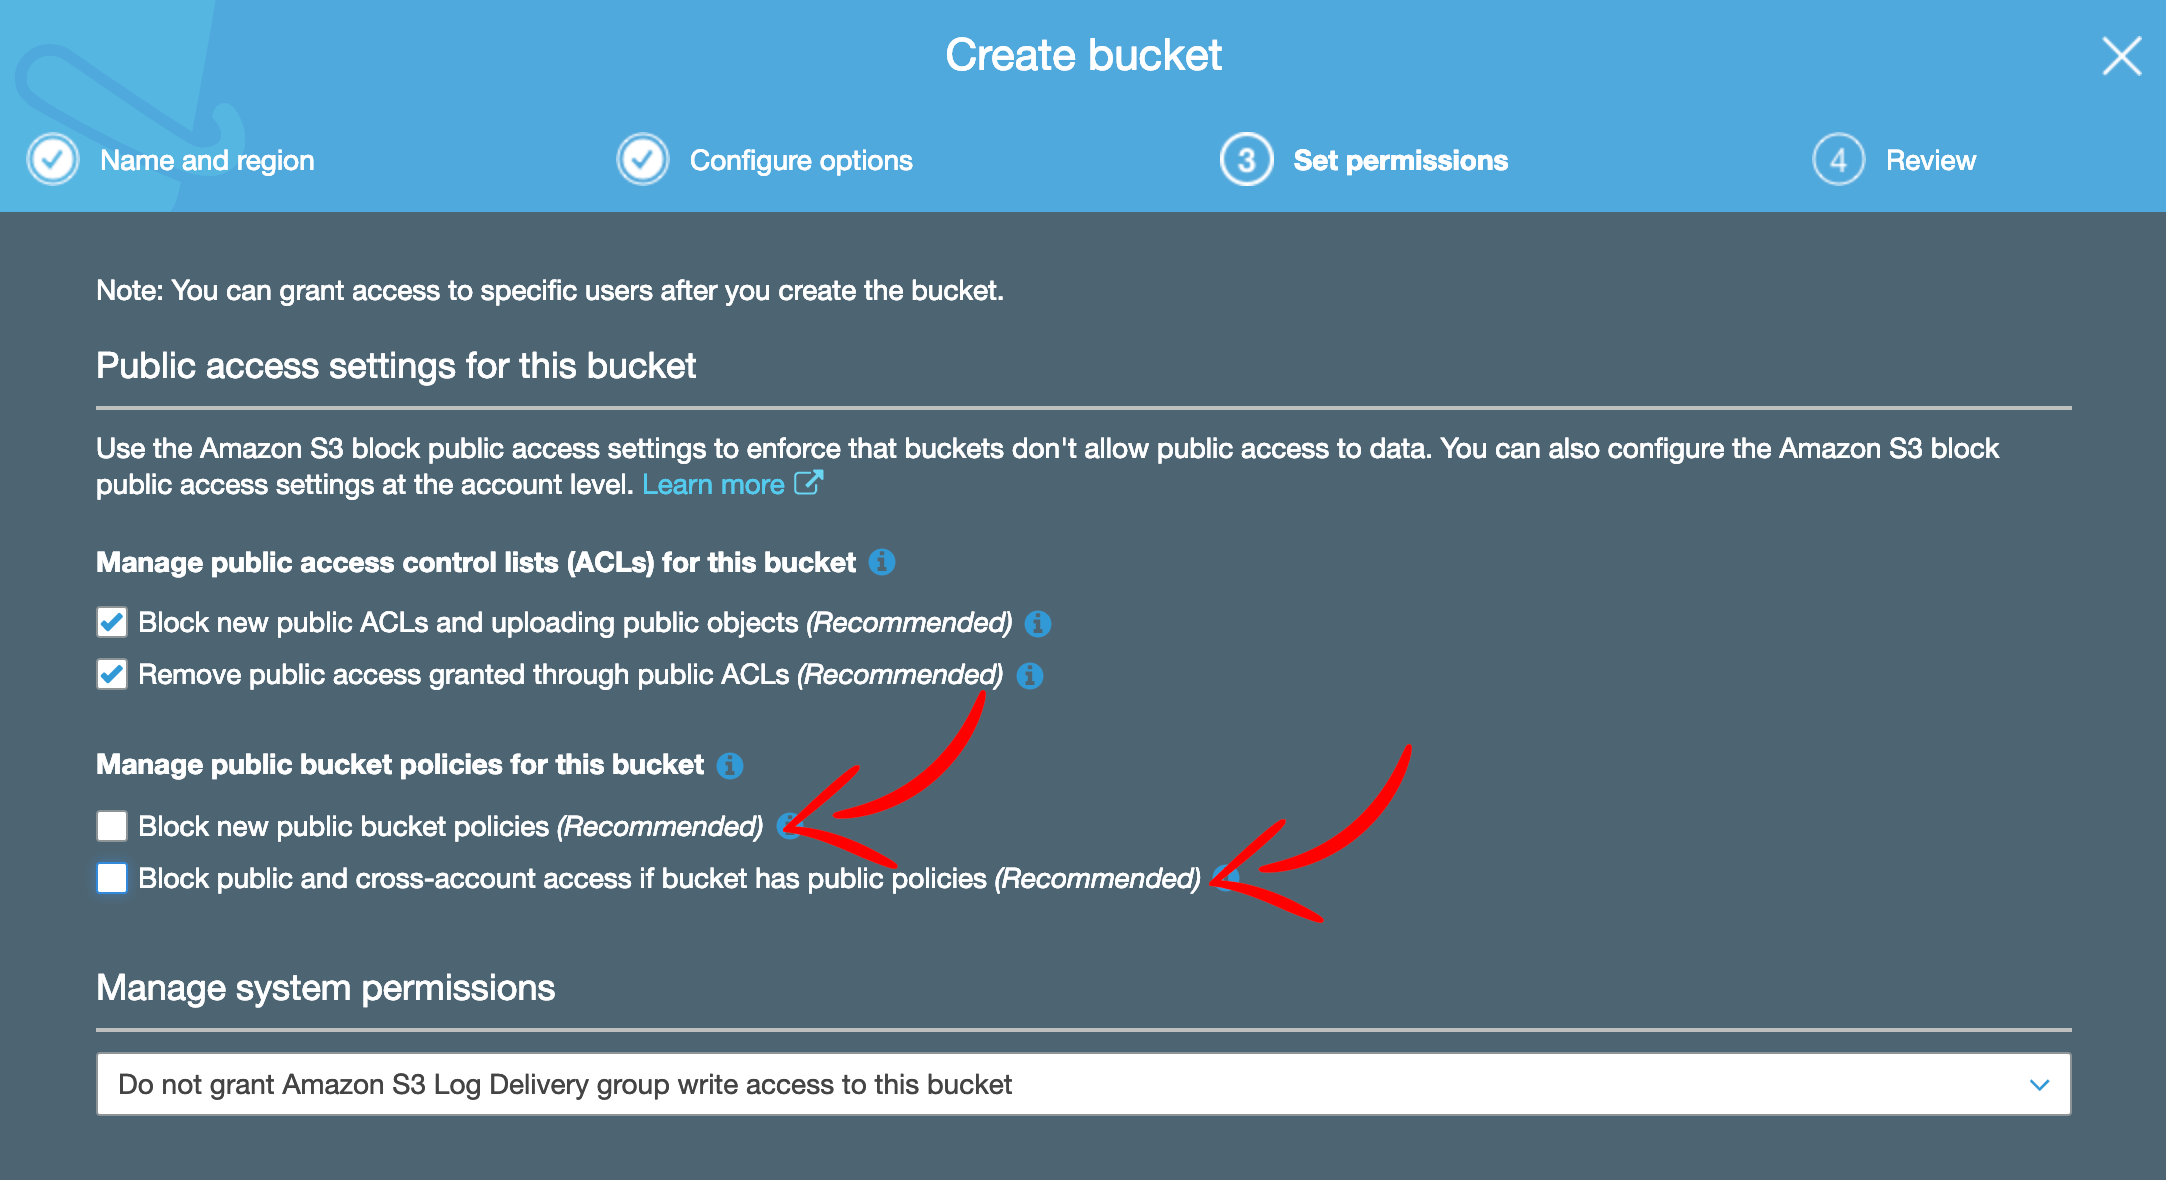
Next be sure to uncheck two public bucket policies options. This is intended to make this bucket public and you need to be able to add policy to allow public access later. If you keep these two options checked, you will receive Access denied error when try to add public access policy.
After the bucket is created, you should enable public access to it (as it will be a public website). Open newly created bucket, go to Permissions tab, and then Bucket policy tab.

Enter the following policy (replace YOUR_BUCKET_NAME with your bucket name) and save it:
{
    "Version": "2012-10-17",
    "Statement": [
        {
            "Sid": "PublicReadGetObject",
            "Effect": "Allow",
            "Principal": "*",
            "Action": "s3:GetObject",
            "Resource": "arn:aws:s3:::YOUR_BUCKET_NAME/*"
        }
    ]
}
After the policy is saved, the bucket will be marked as Public.

Next, you should enable public website hosting for this bucket.
Open bucket, go to Properties tab, and then open Static website hosting section. Check Use this bucket to host a website and enter Index document. Save the changes.
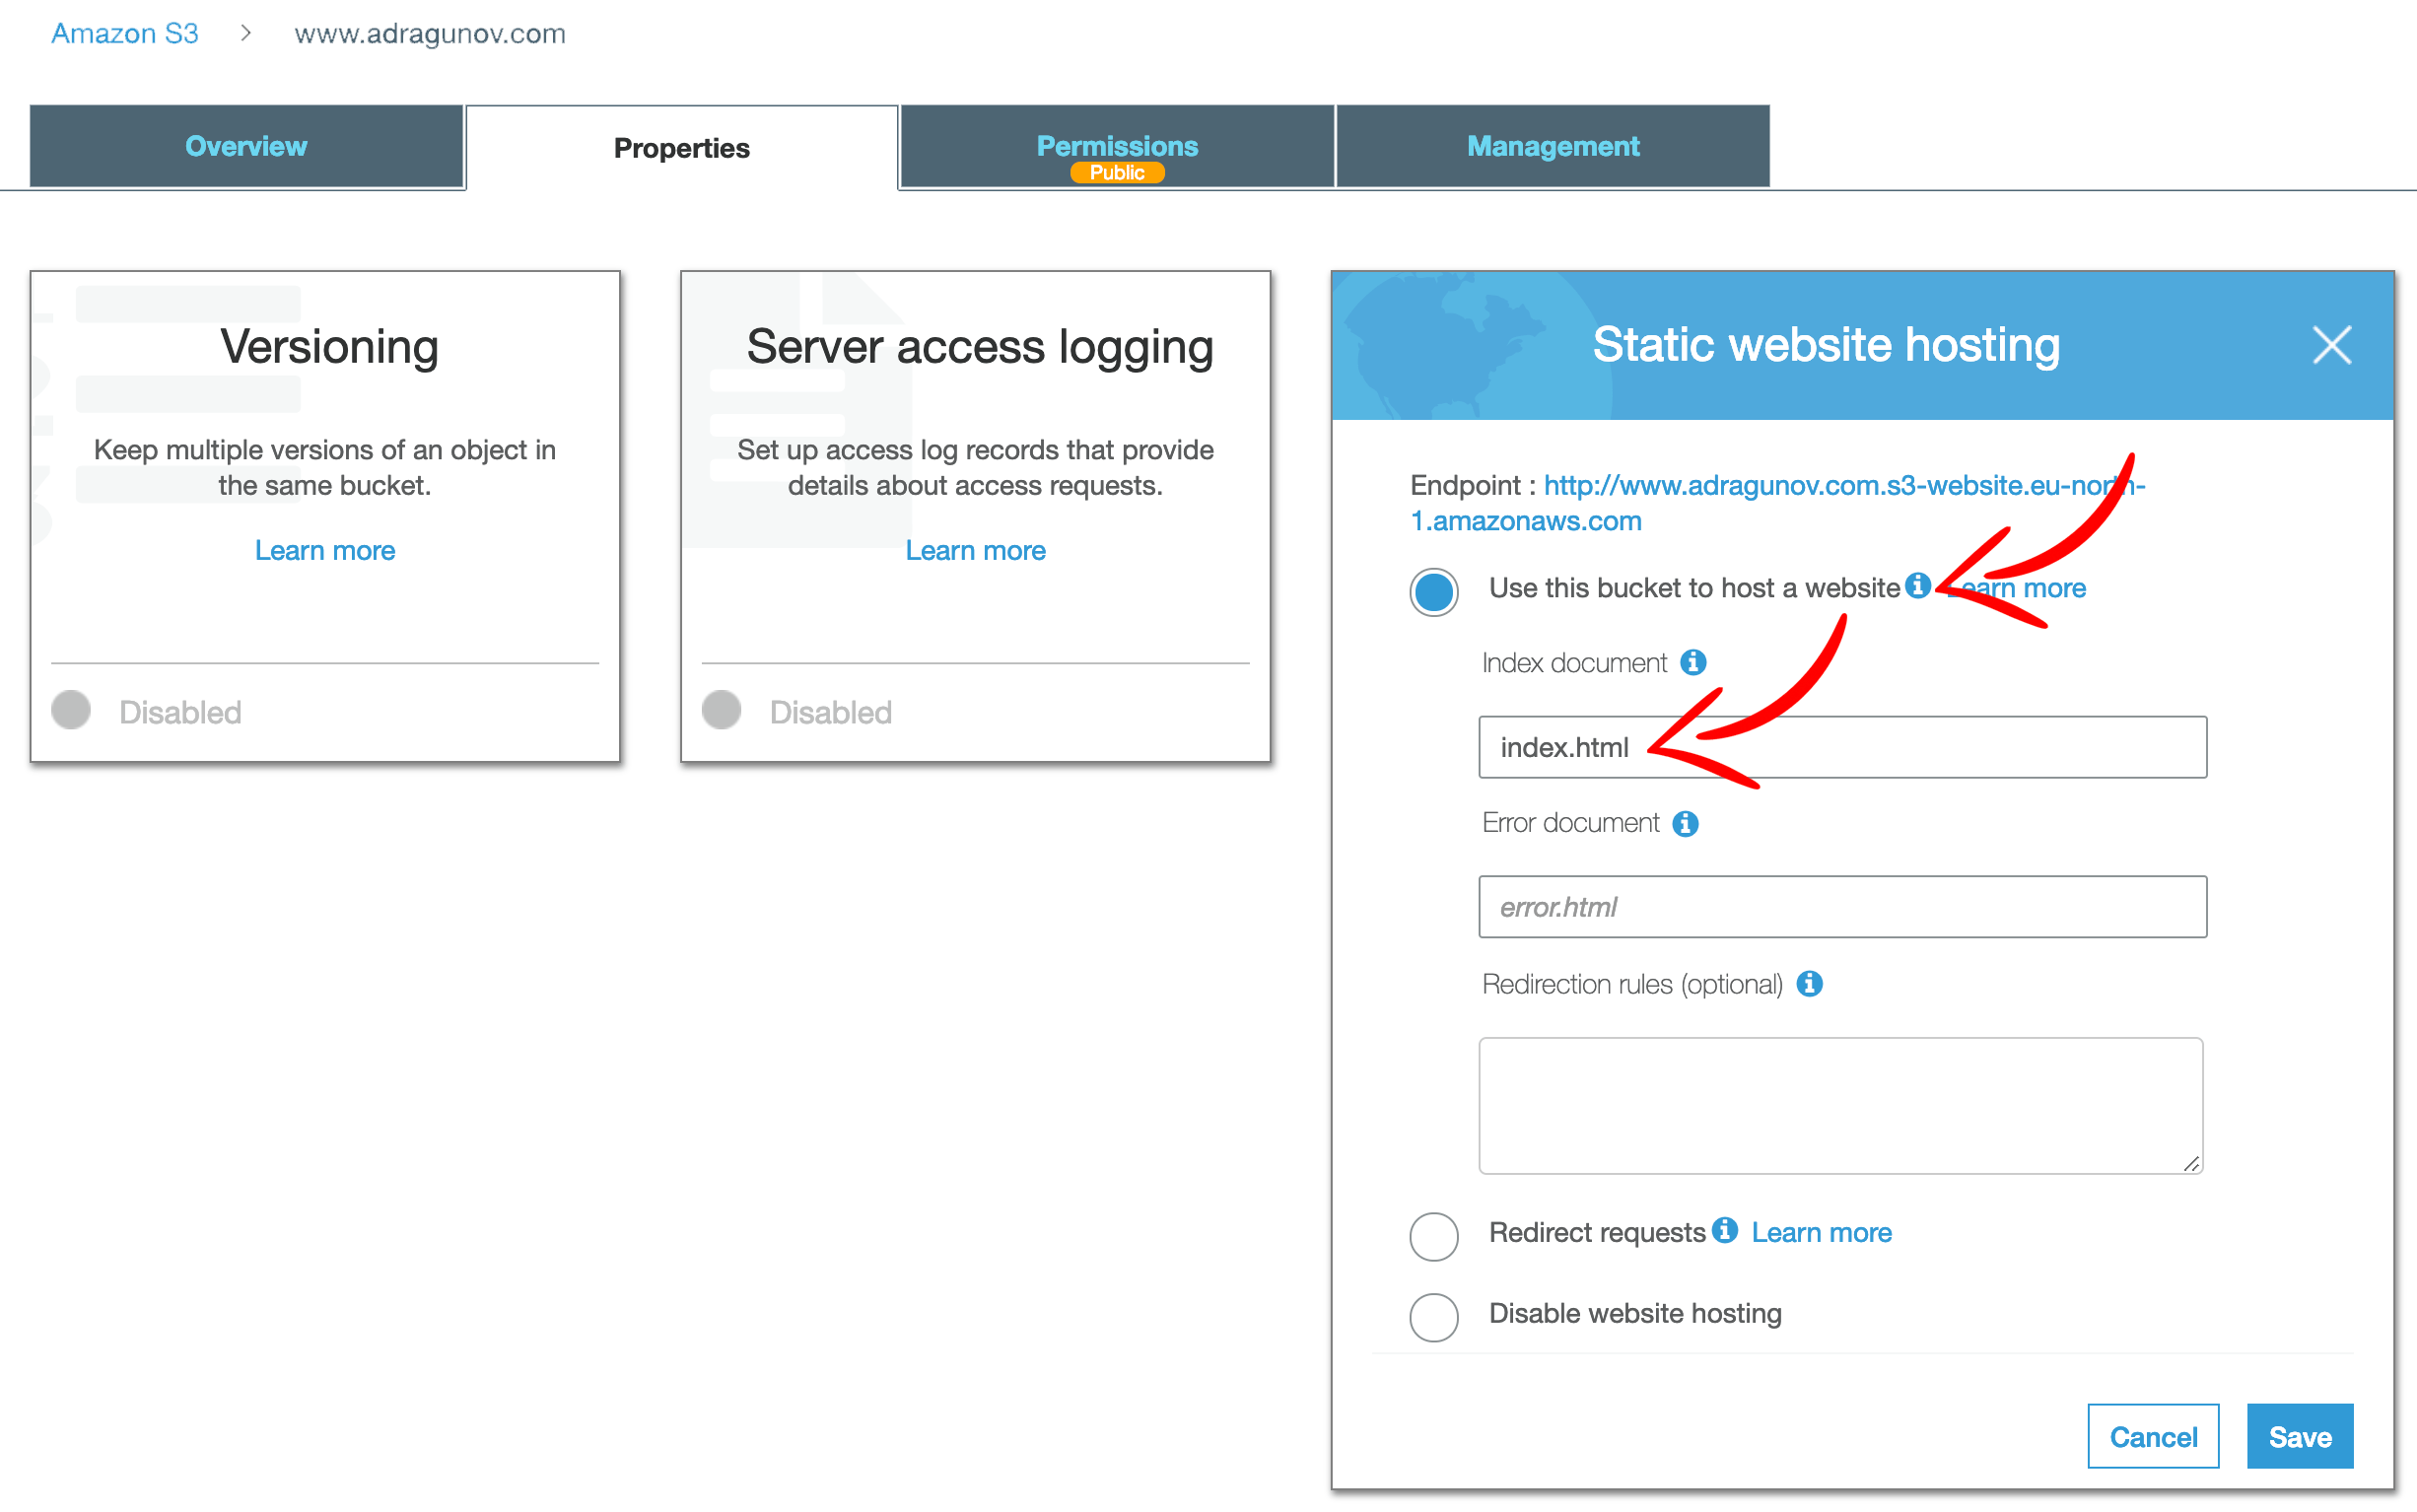
Now the bucket is created, public access to it is allowed and website hosting for it is enabled. So you can upload some static assests to the newly created bucket, like sample index.html page. By doing this, you can check that it’s publically accessible via endpoint (you can see it on the public website properties above).
Next step is to create second bucket for the naked domain, in my example adragunov.com (without www).
Please follow exactly the same steps as before for the previous bucket, except for the last one when enabling website hosting.
Instead configure the bucket to redirect requests to www.adragunov.com and use https as protocol.
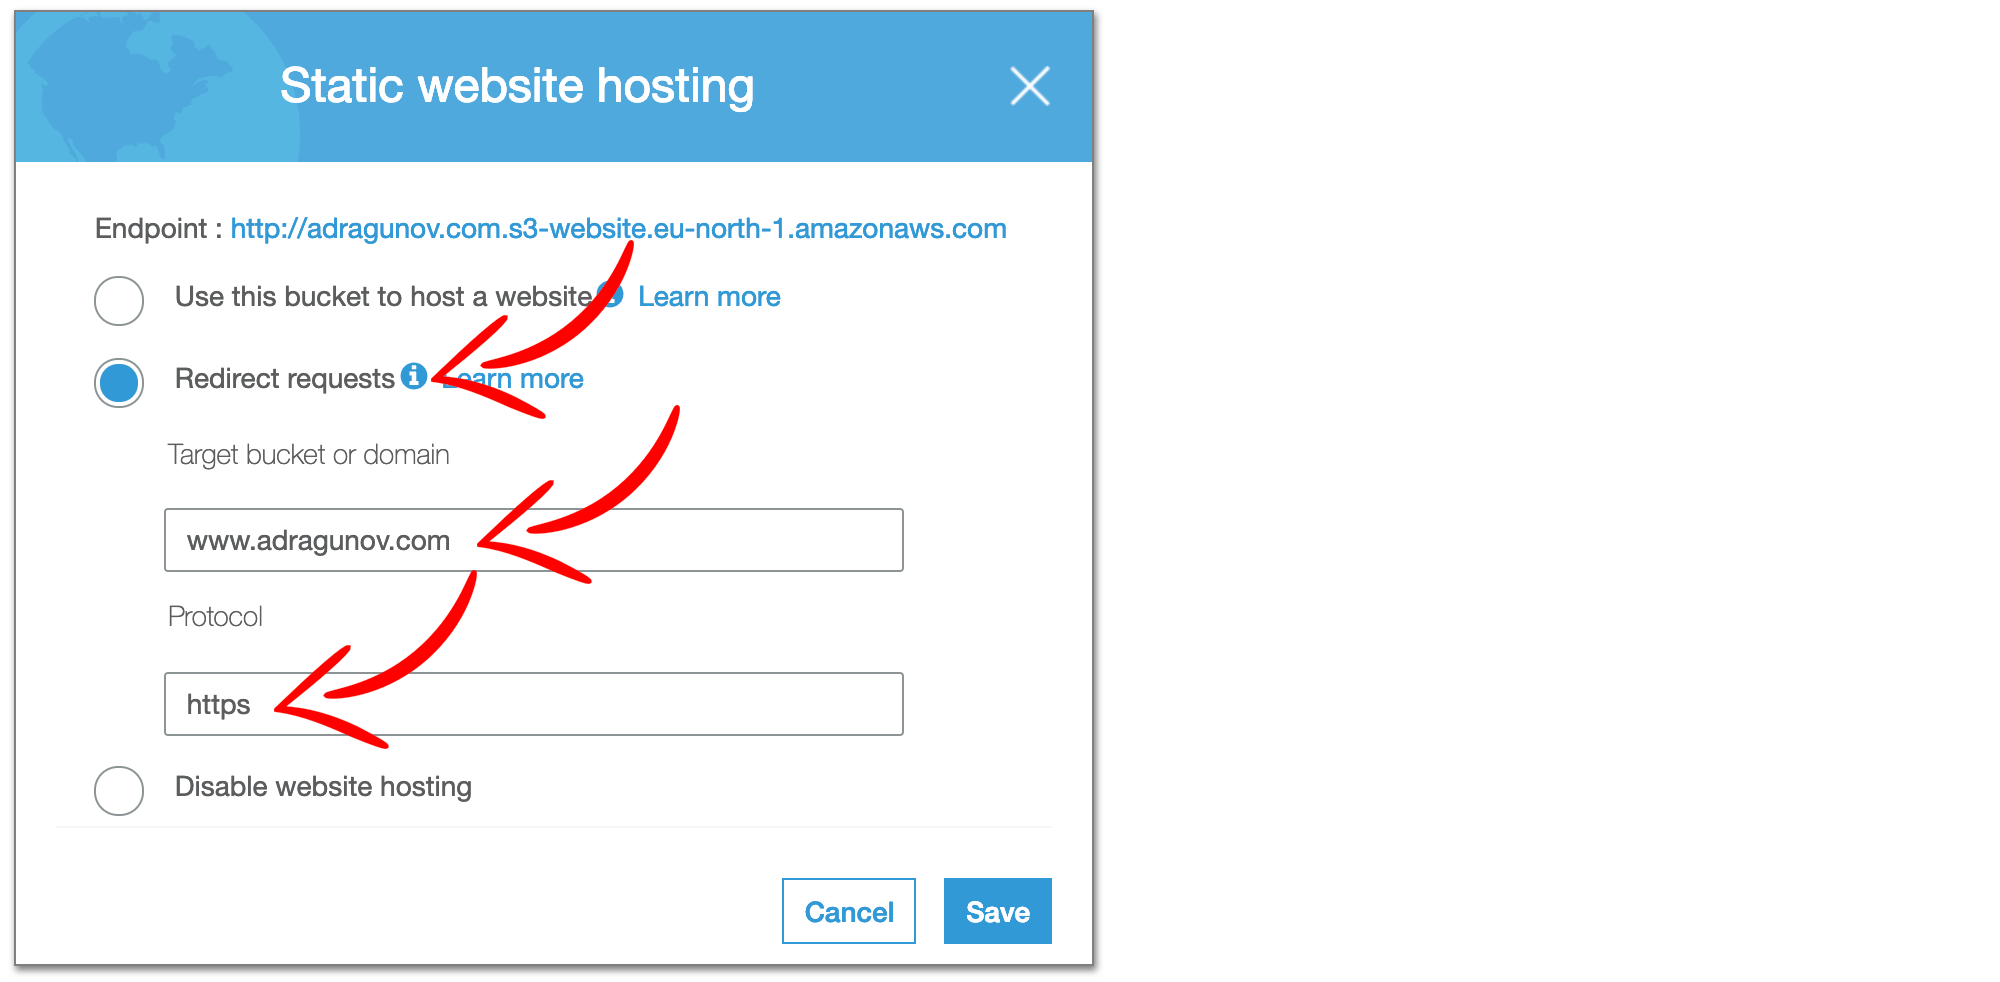
Also as this bucket redirects all requests to the other bucket, you should not upload any content to this naked bucket.
Step 3: Create CloudFront ditributions
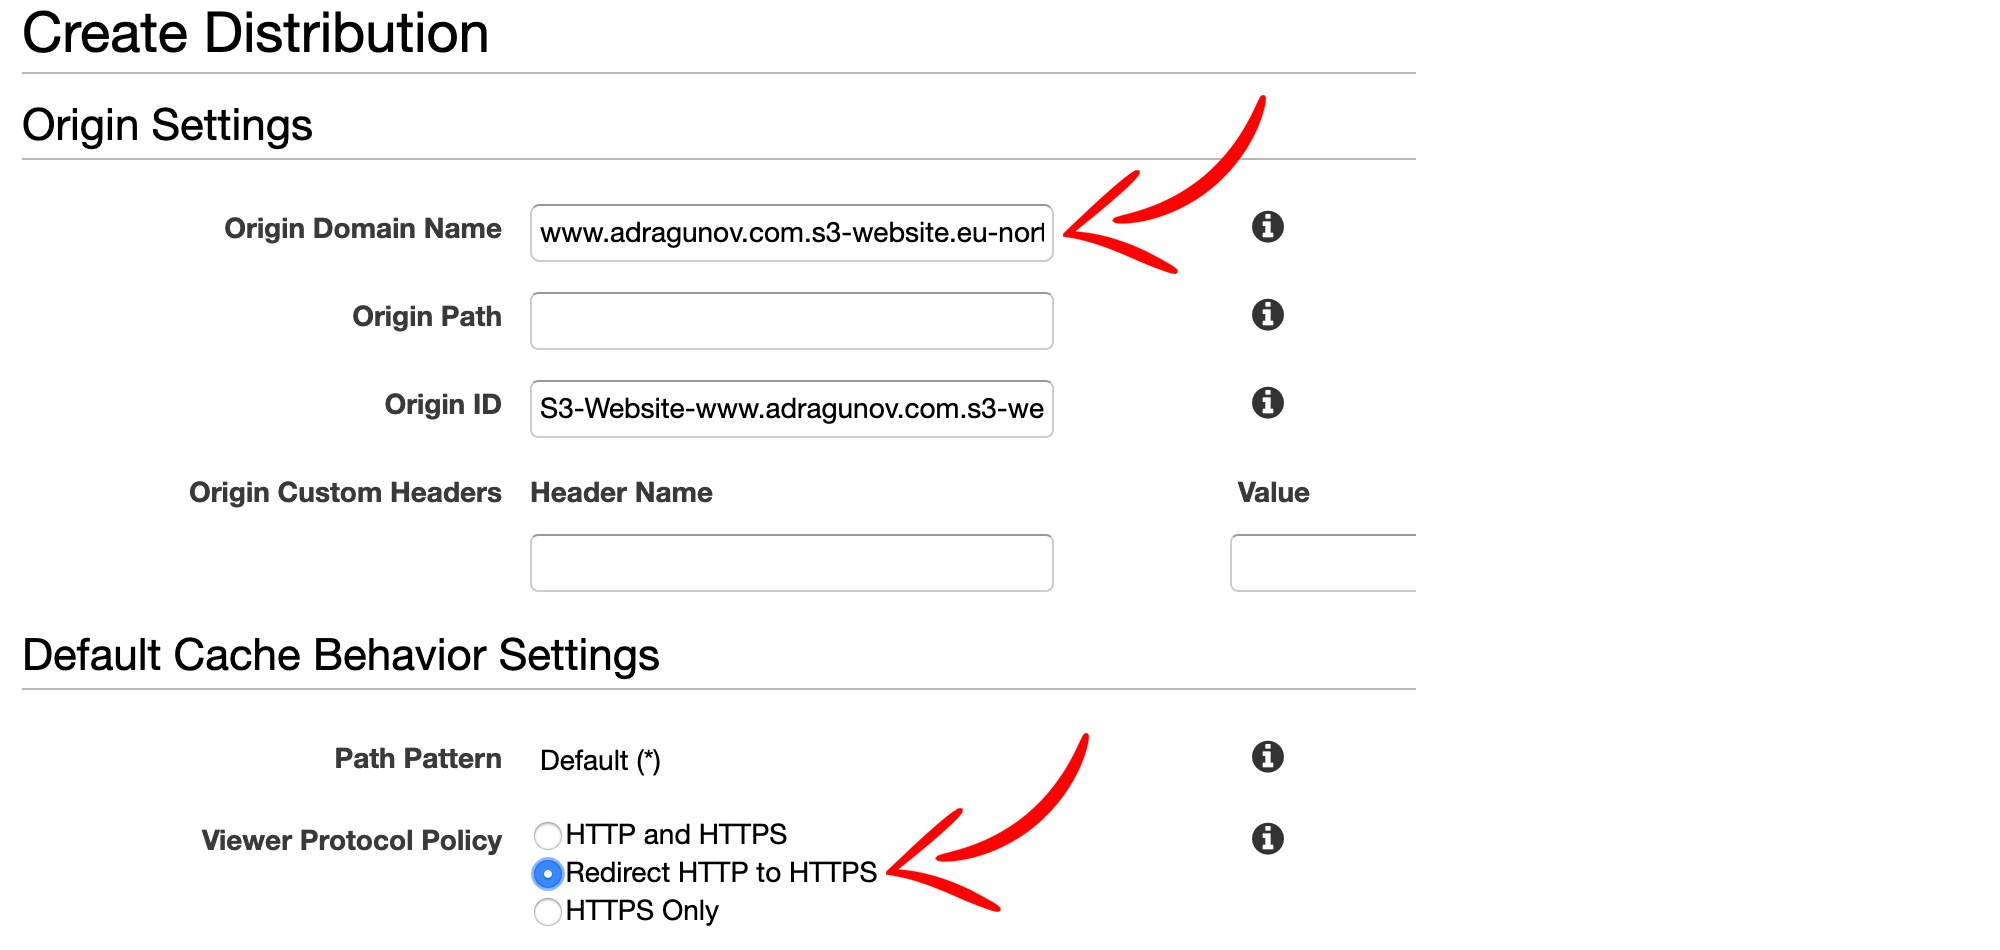
Next create two CloudFront distributions for these two buckets using https certificate created before. Go to AWS Console and open CloudFront.
Create first distribution for the fist bucket, in my case for the www.adragunov.com.

IMPORTANT: As
Origin Domain Namepaste URL for the public website for the S3 bucket that was created (do not choose anything from dropdown!). URL should look likeBUCKET-NAME.s3-website.REGION.amazonaws.com.
For viewer protocol policy choose Redirect HTTP to HTTPS.
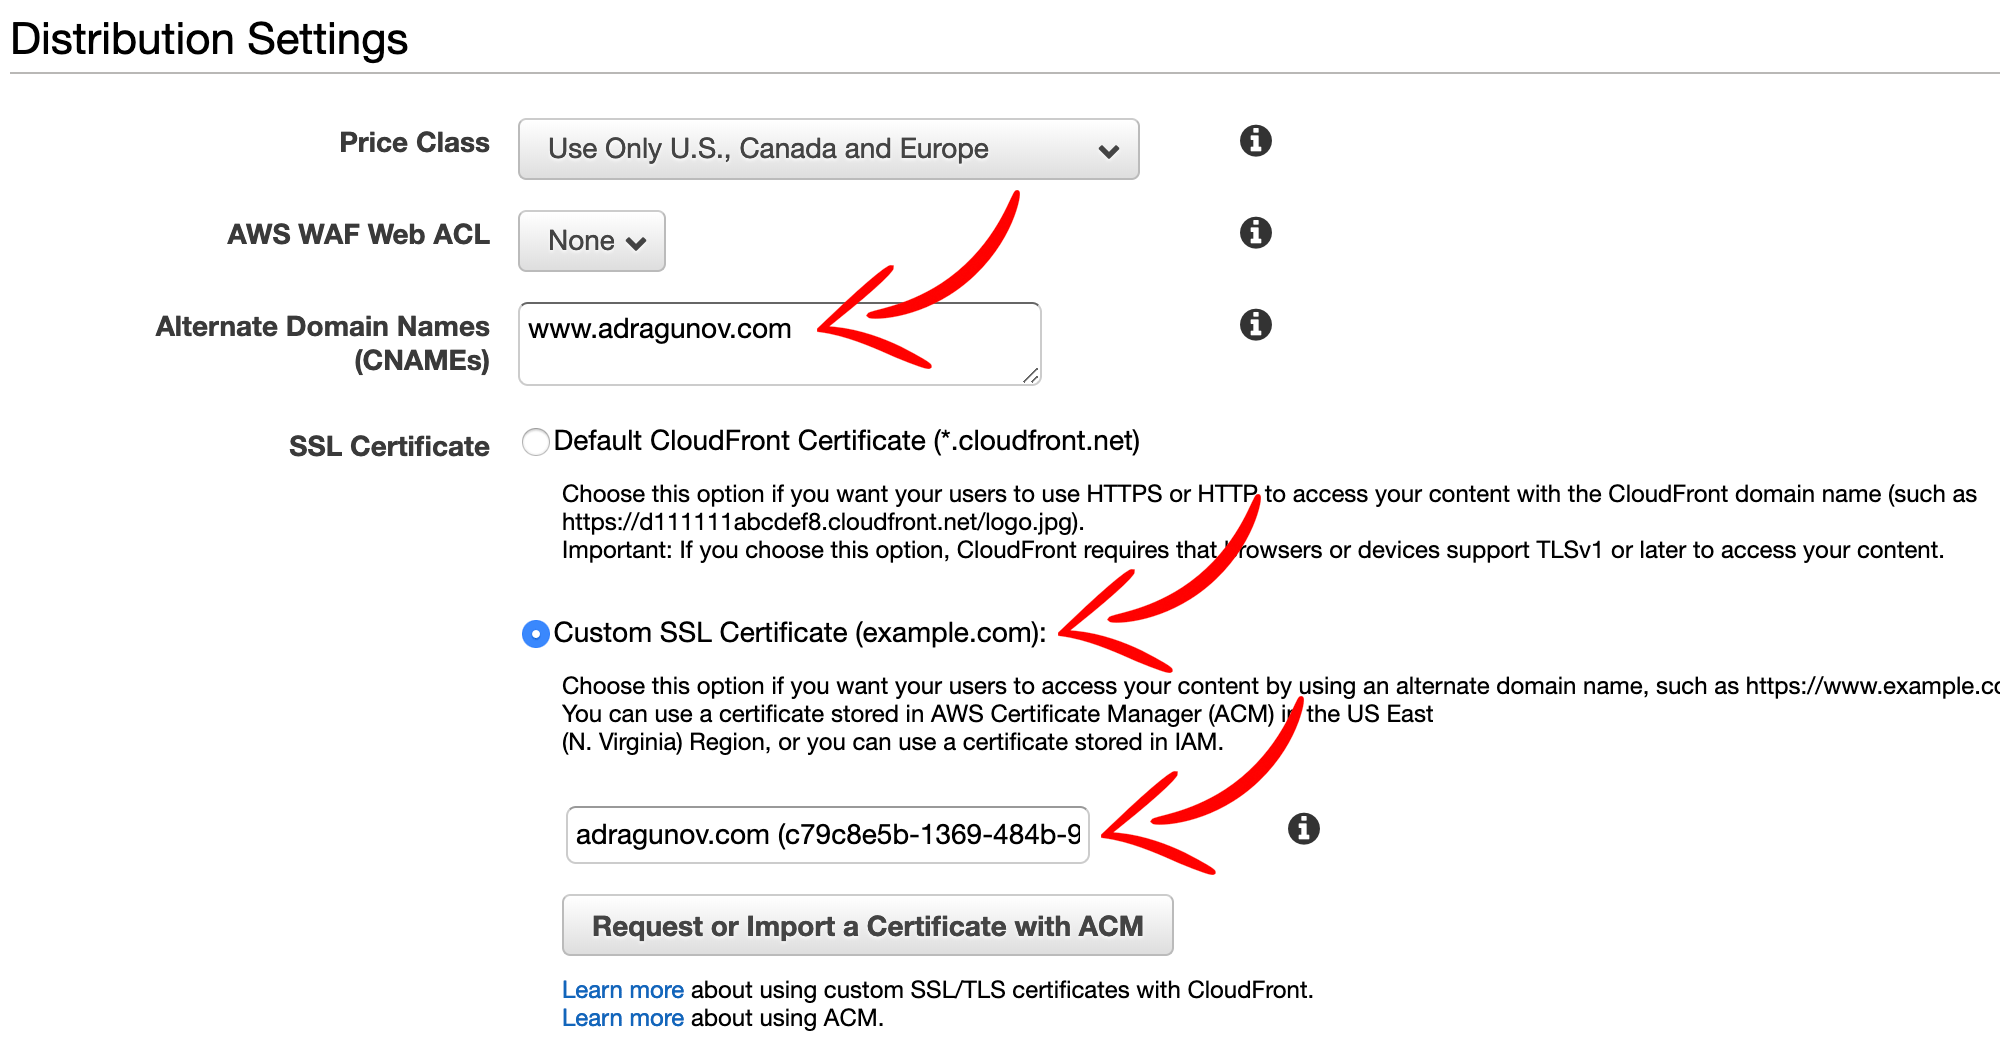
Enter CNAME of the domain. Choose Custom SSL certificate and select certificate from dropdown (the one that was created in the beginning).
IMPORTANT: Again please note that you can only use certificate created in
US East (N. Virginia) (us-east-1)region.
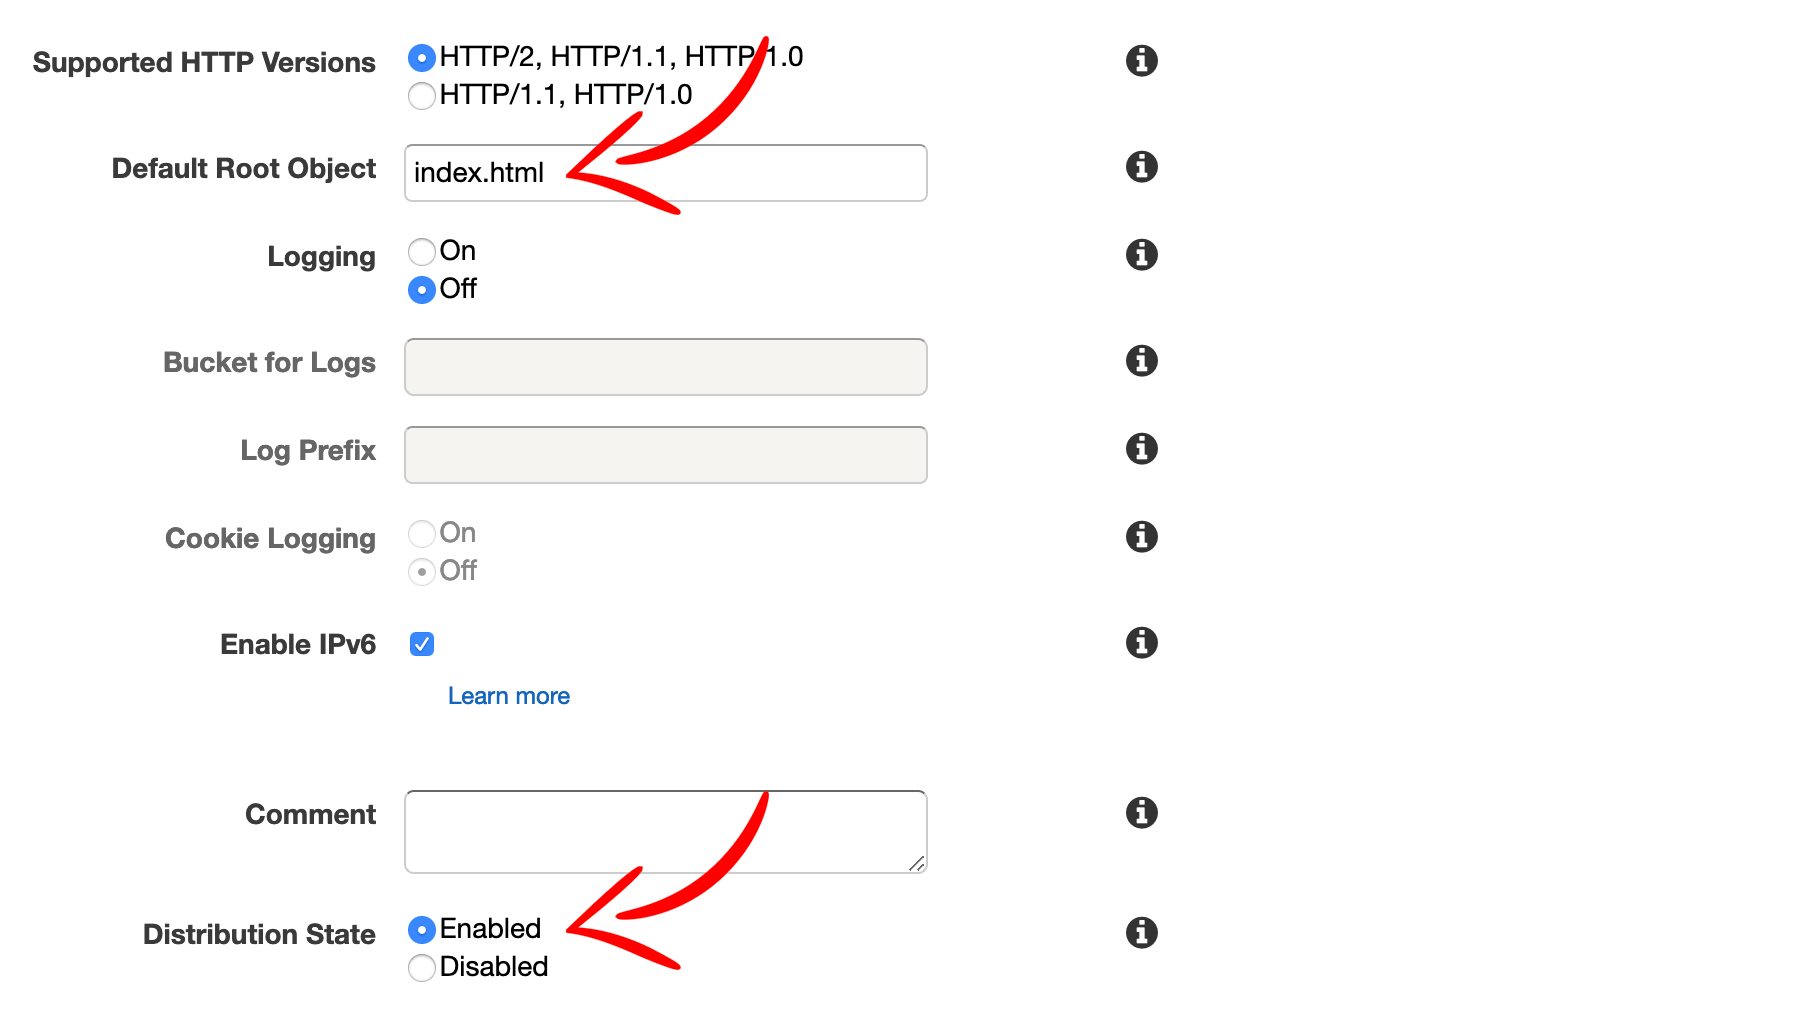
Enter default root object (in my case the start page is index.html).
Next create new distribution for the naked domain, in my case for the adragunov.com.
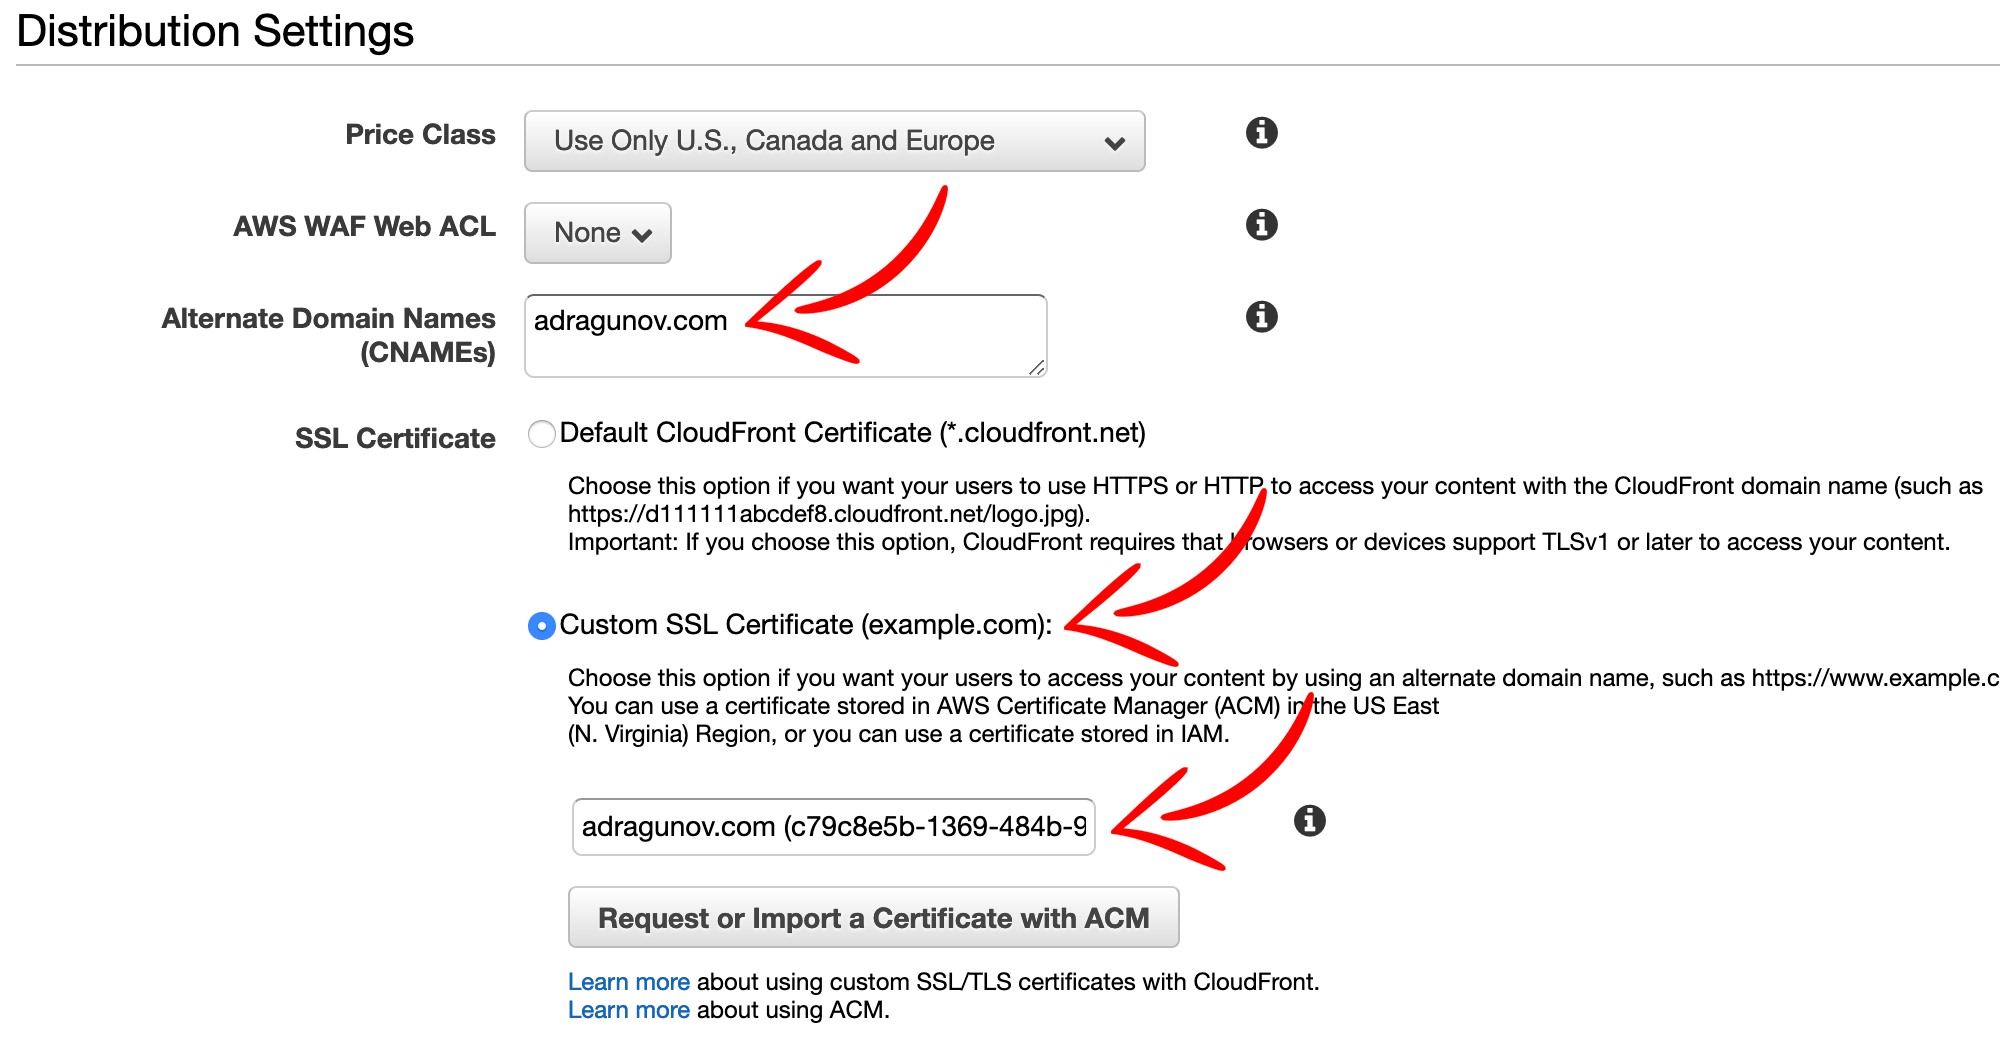
The difference is that you do not need to enter default root object as this bucket is already configured to redirect all requests to your www bucket.
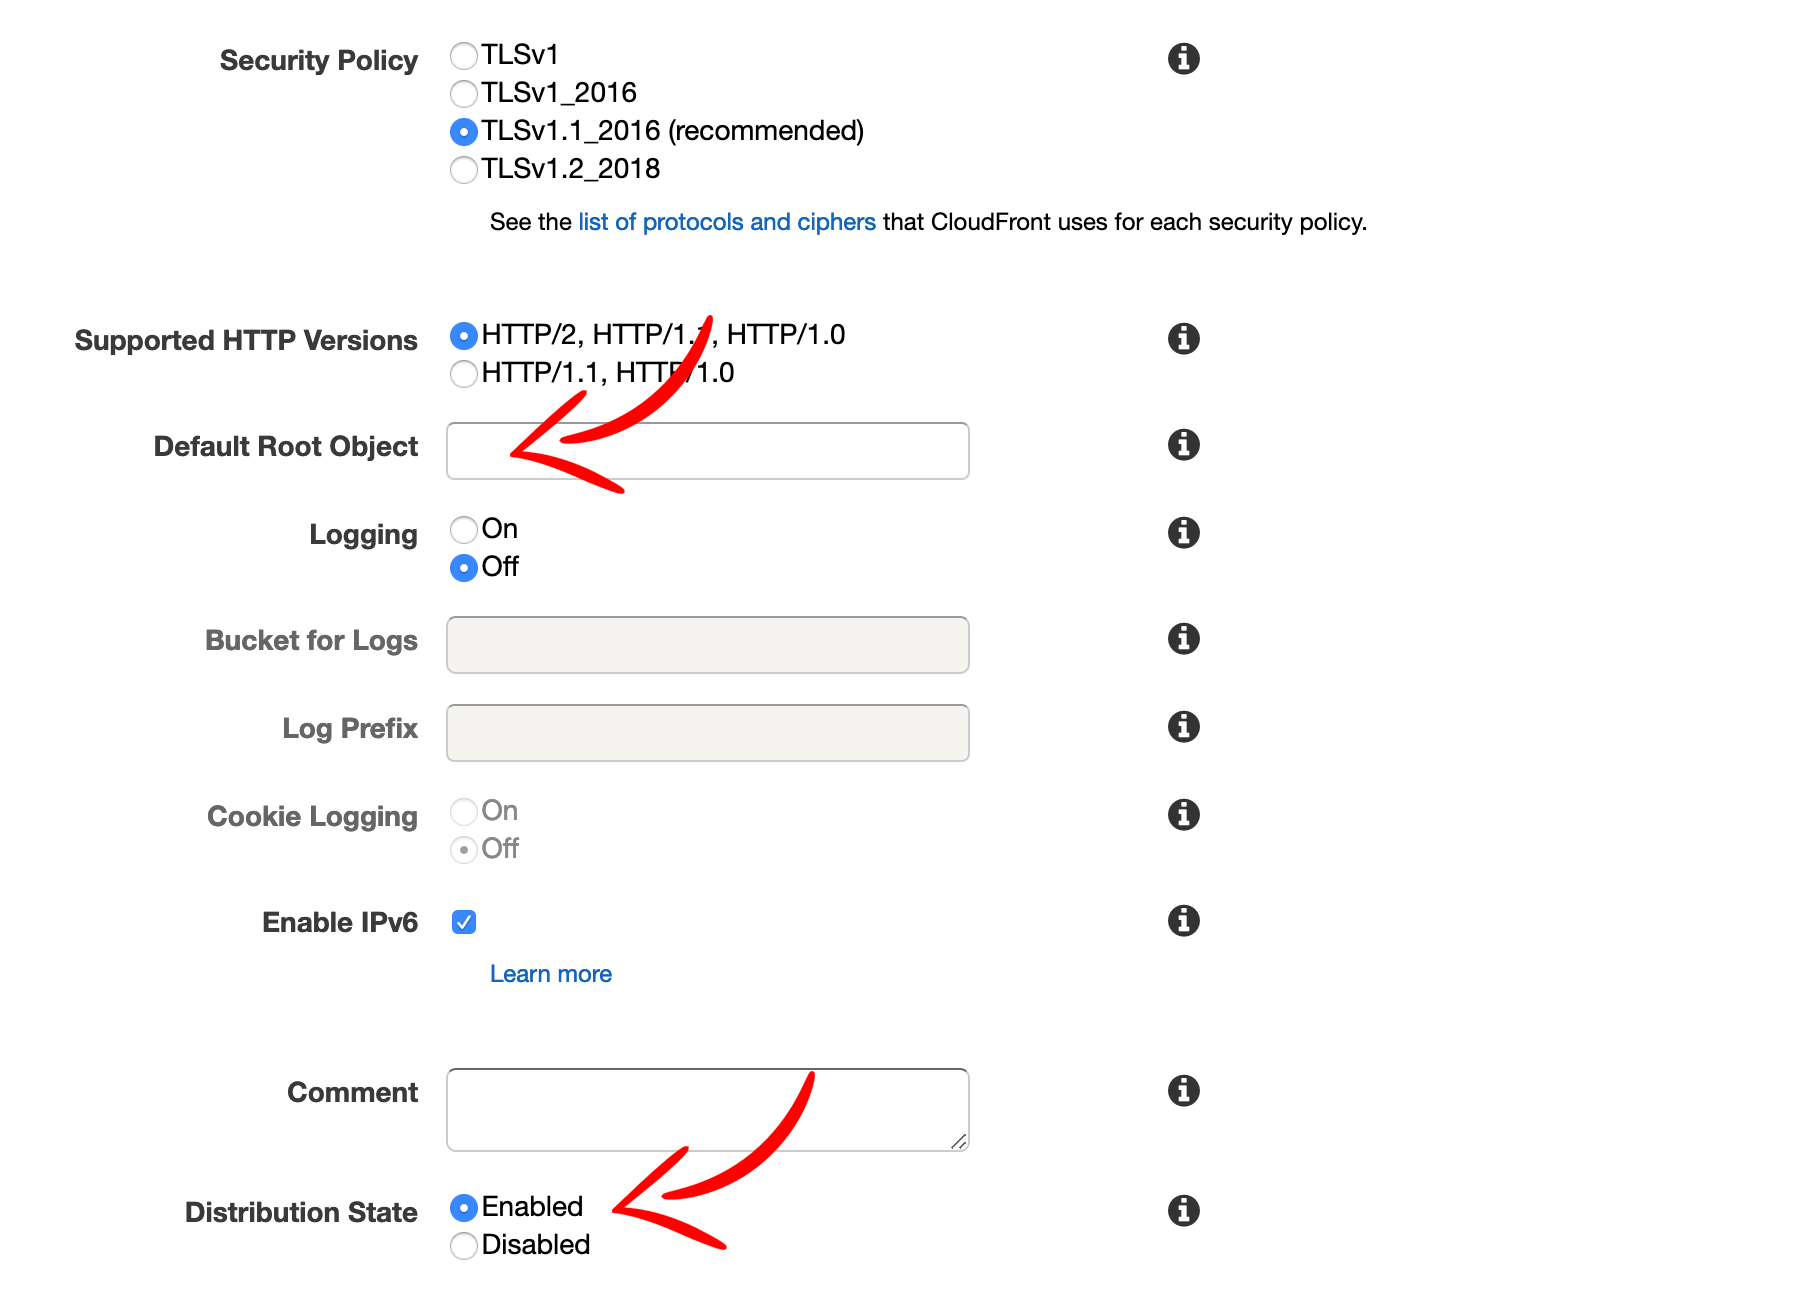
Step 4: Configure Route 53
The last step is to configure DNS entries in Route 53 to point to the newly created CloudFront distrubutions.
Go to AWS Console and open Route 53. Open Hosted zone for your domain and click Create Record Set.

- Enter name
www. - Choose
Aas type. - Check Alias as
Yes. - Choose CloudFront distribution for your
wwwdomain from the list.
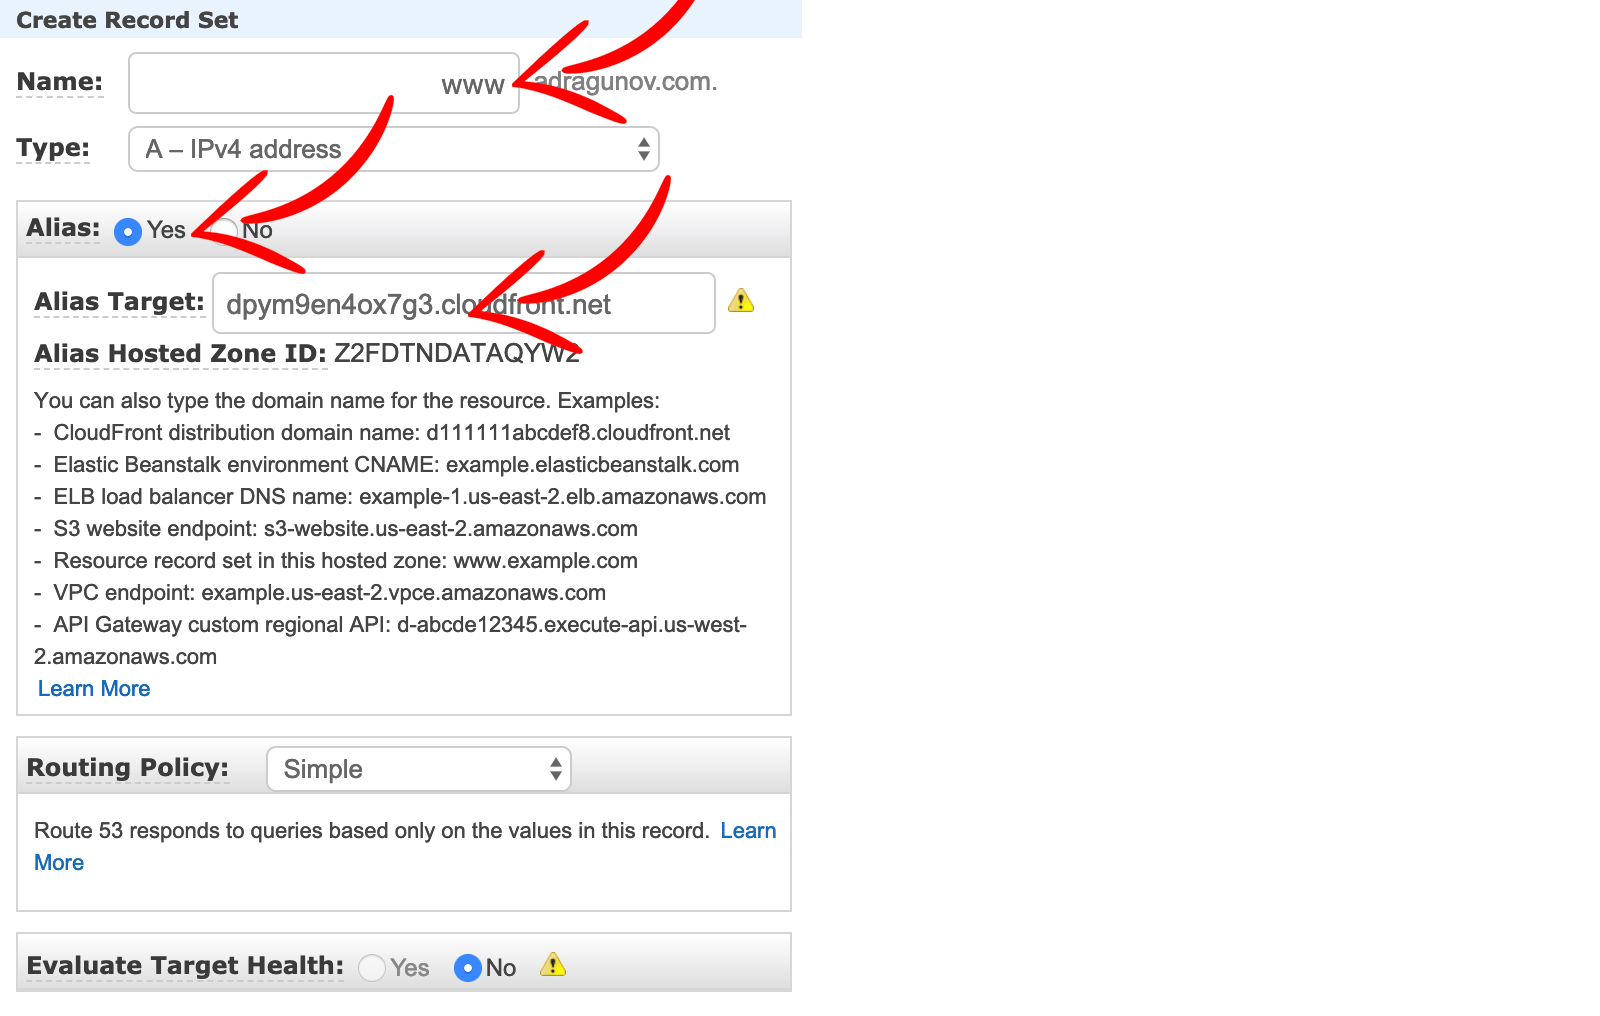
Next create one more Record Set for the naked domain (leave name empty and choose CloudFront distribution for the naked domain, in my case to the adragunov.com).
So at the end the final configuration will look like this:
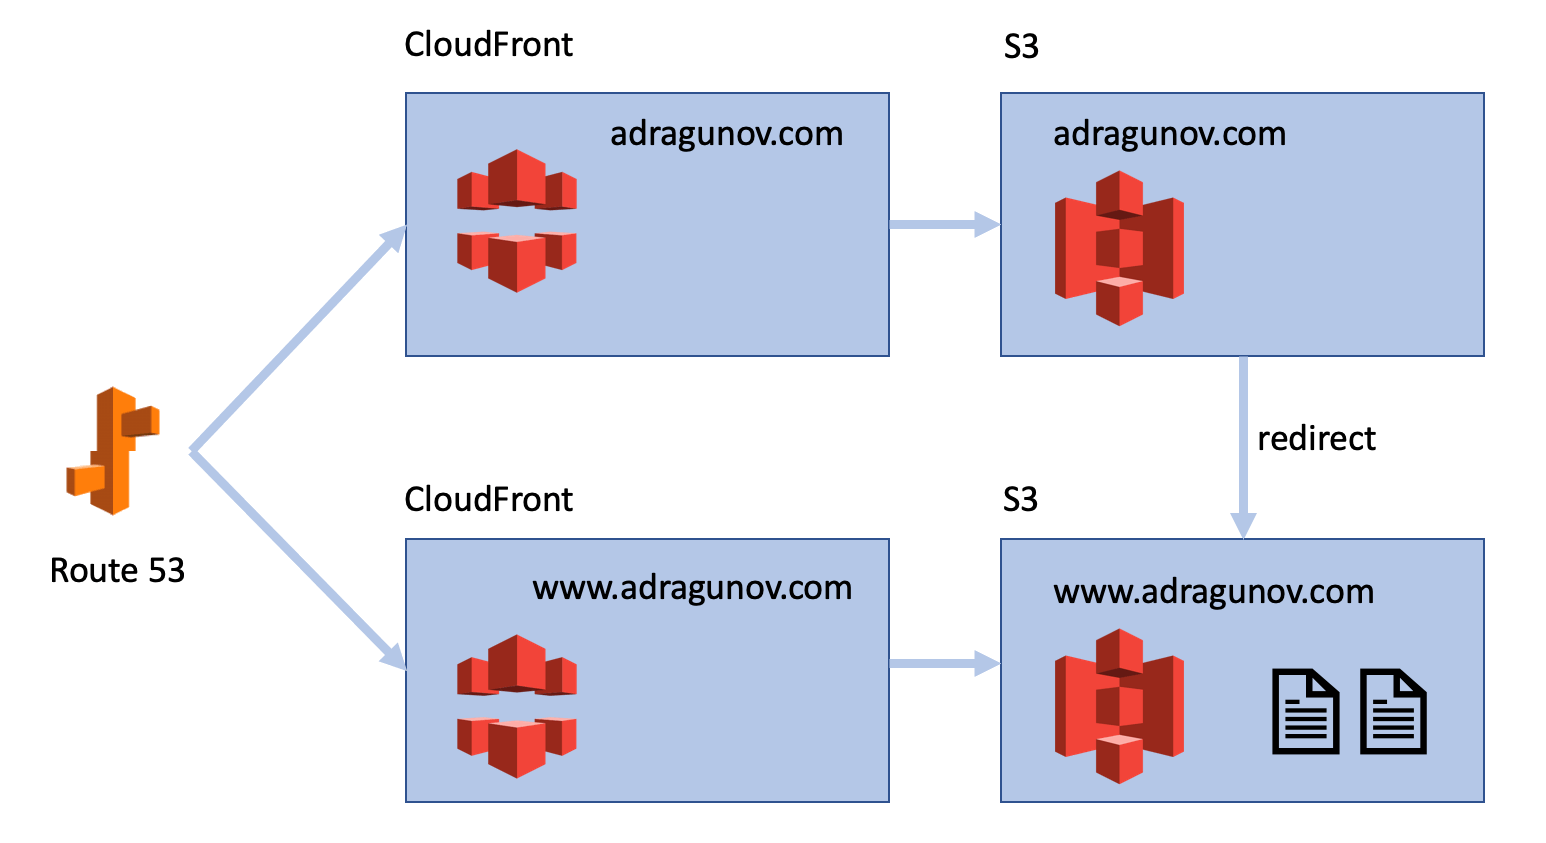
That is it!
If you are hosting Single Page Application (SPA) and need to make client side routing working, please refer to Static website hosting and client side routing.