I’ve used GoDaddy for the hosting of my personal photo web site since 2012, and every time I logged in into the GoDaddy portal I felt lost by the amount of different ads, partner services and security packages. Also the price for the same hosting plan has raised from 80$/year to over 130$/year during past few years.
So being developer I’ve decided to move both my web site and domain to AWS to keep everything in one single developer-friendly place.
This is part one of the series of blog posts on how I set up my personal web sites in AWS so that my developer nature is happy.
Let’s get started!
First of all check that your top level domain is supported by Route 53: Domains That You Can Register with Amazon Route 53
In order for domain to be transfered, it should not be locked. Go to GoDaddy portal to list of your domains and click Manage.

Scroll down to the Additional Settings and unlock your domain. It could take few minutes for the status to be changed.

Once your domain is unlocked, you should request Authorization code.

Few minutes later you should get two emails from GoDaddy: one notifying that status is changed to Unlocked and the second one with your Authorization code. You will need the code from this email later when requesting tranfer to Route 53.

Next you should switch to AWS Management Console and open Amazon Route 53 console.
Go to Hosted zones left menu and click Create Hosted Zone button and enter your domain name.

As a result Hosted zone will be created with name servers entries pointing to AWS DNS.
IMPORTANT: If you are currently using your domain, you have to create/copy all your needed record sets from GoDaddy DNS records. In my case it was only one CNAME record pointing to my Azuze CDN and one TXT record for the Google domain verification.

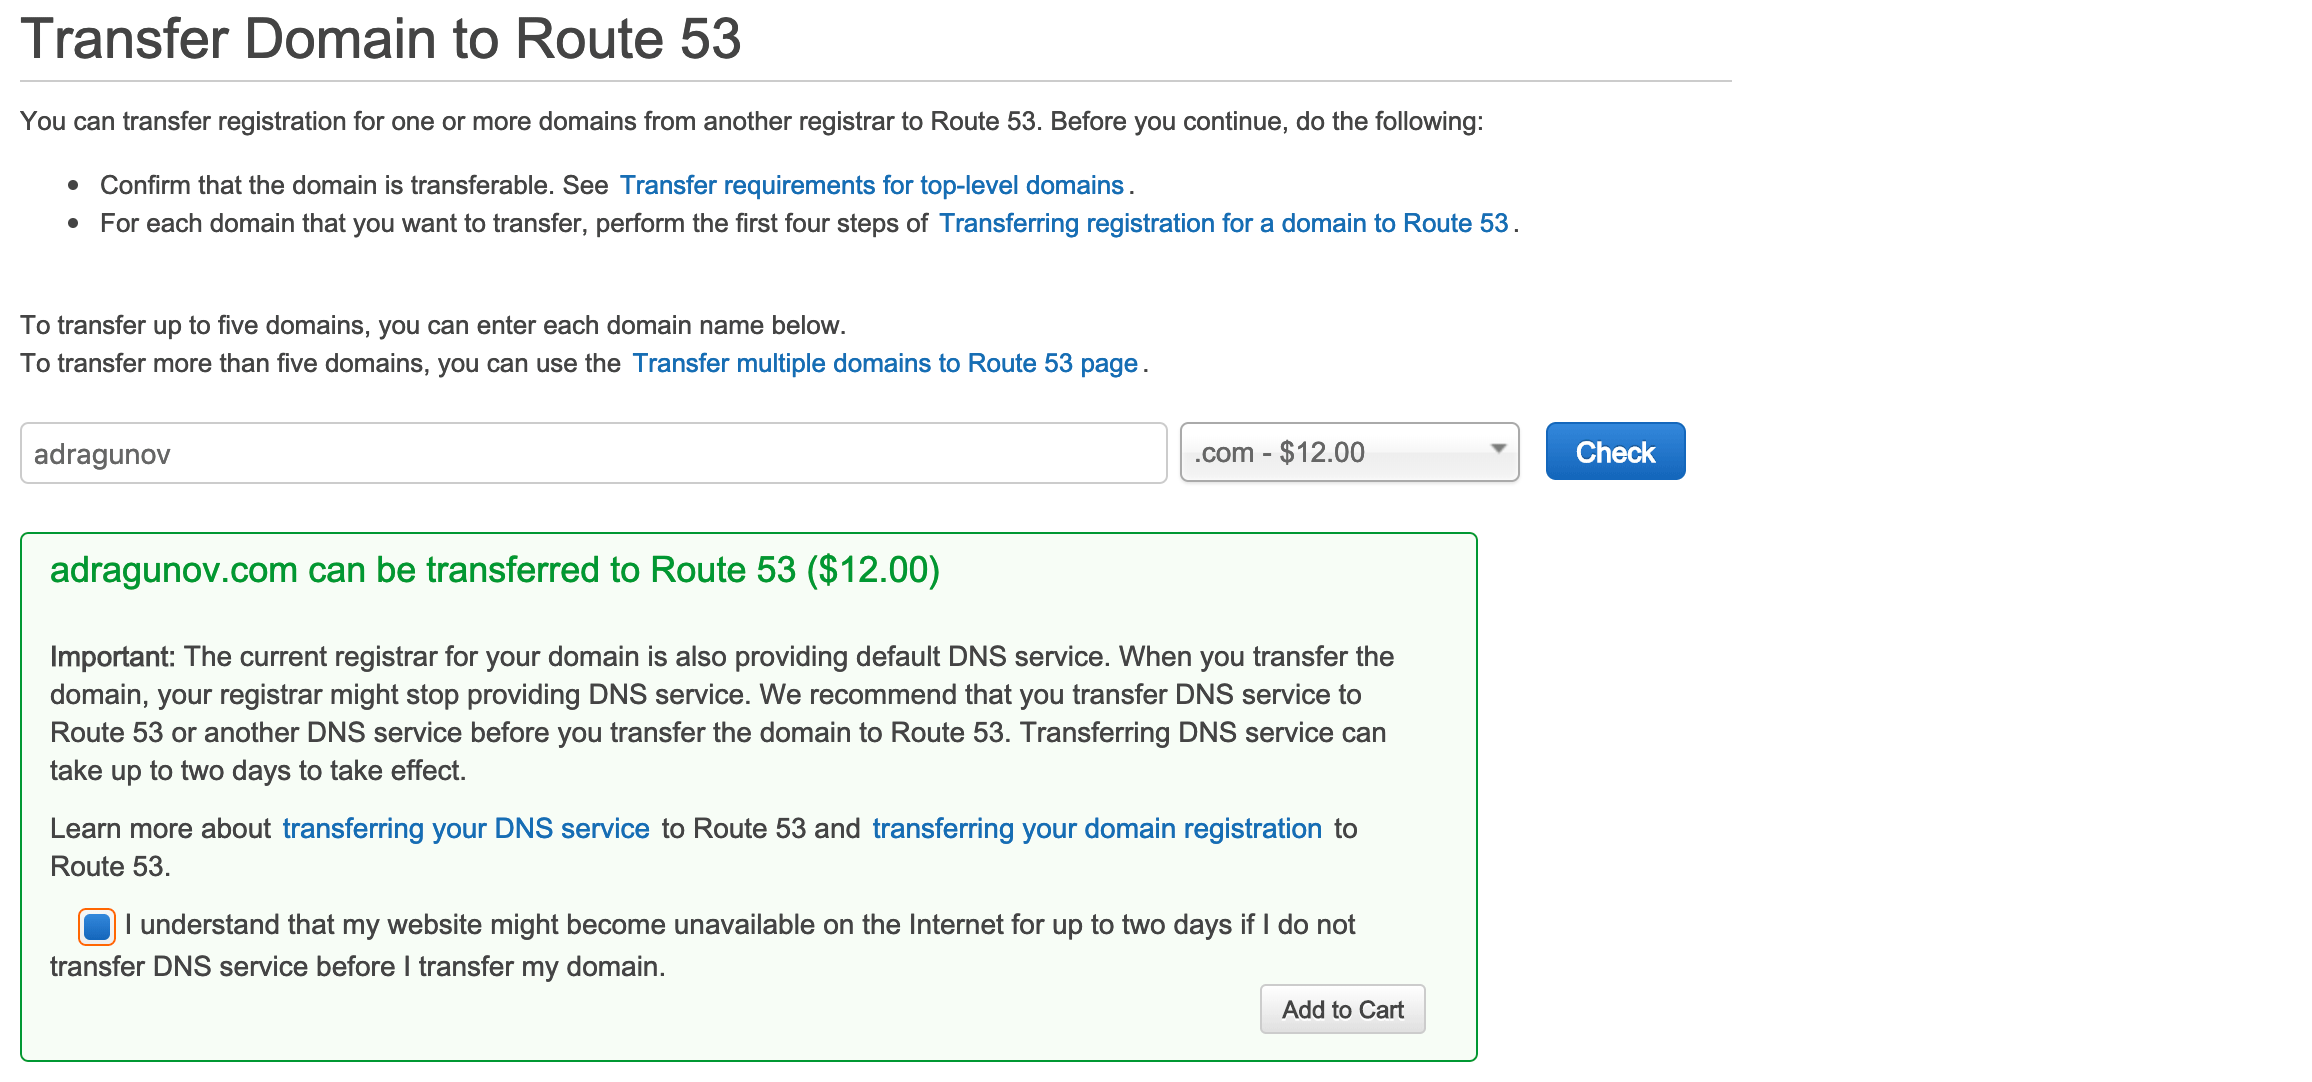
Next go to Registered domains menu and click Transfer Domain button. Enter your domain name and click Check. As you already unlocked your domain at GoDaddy portal, you should see green confirmation message that your domain can be transferred to Route 53.
Also I hope you have already created/copied all your records for the hosted zone.
Note, that domain transfer is not free, you will have to pay for 1-year registration extension of domain, 12$ is case of .com domain. So click Add to Cart.


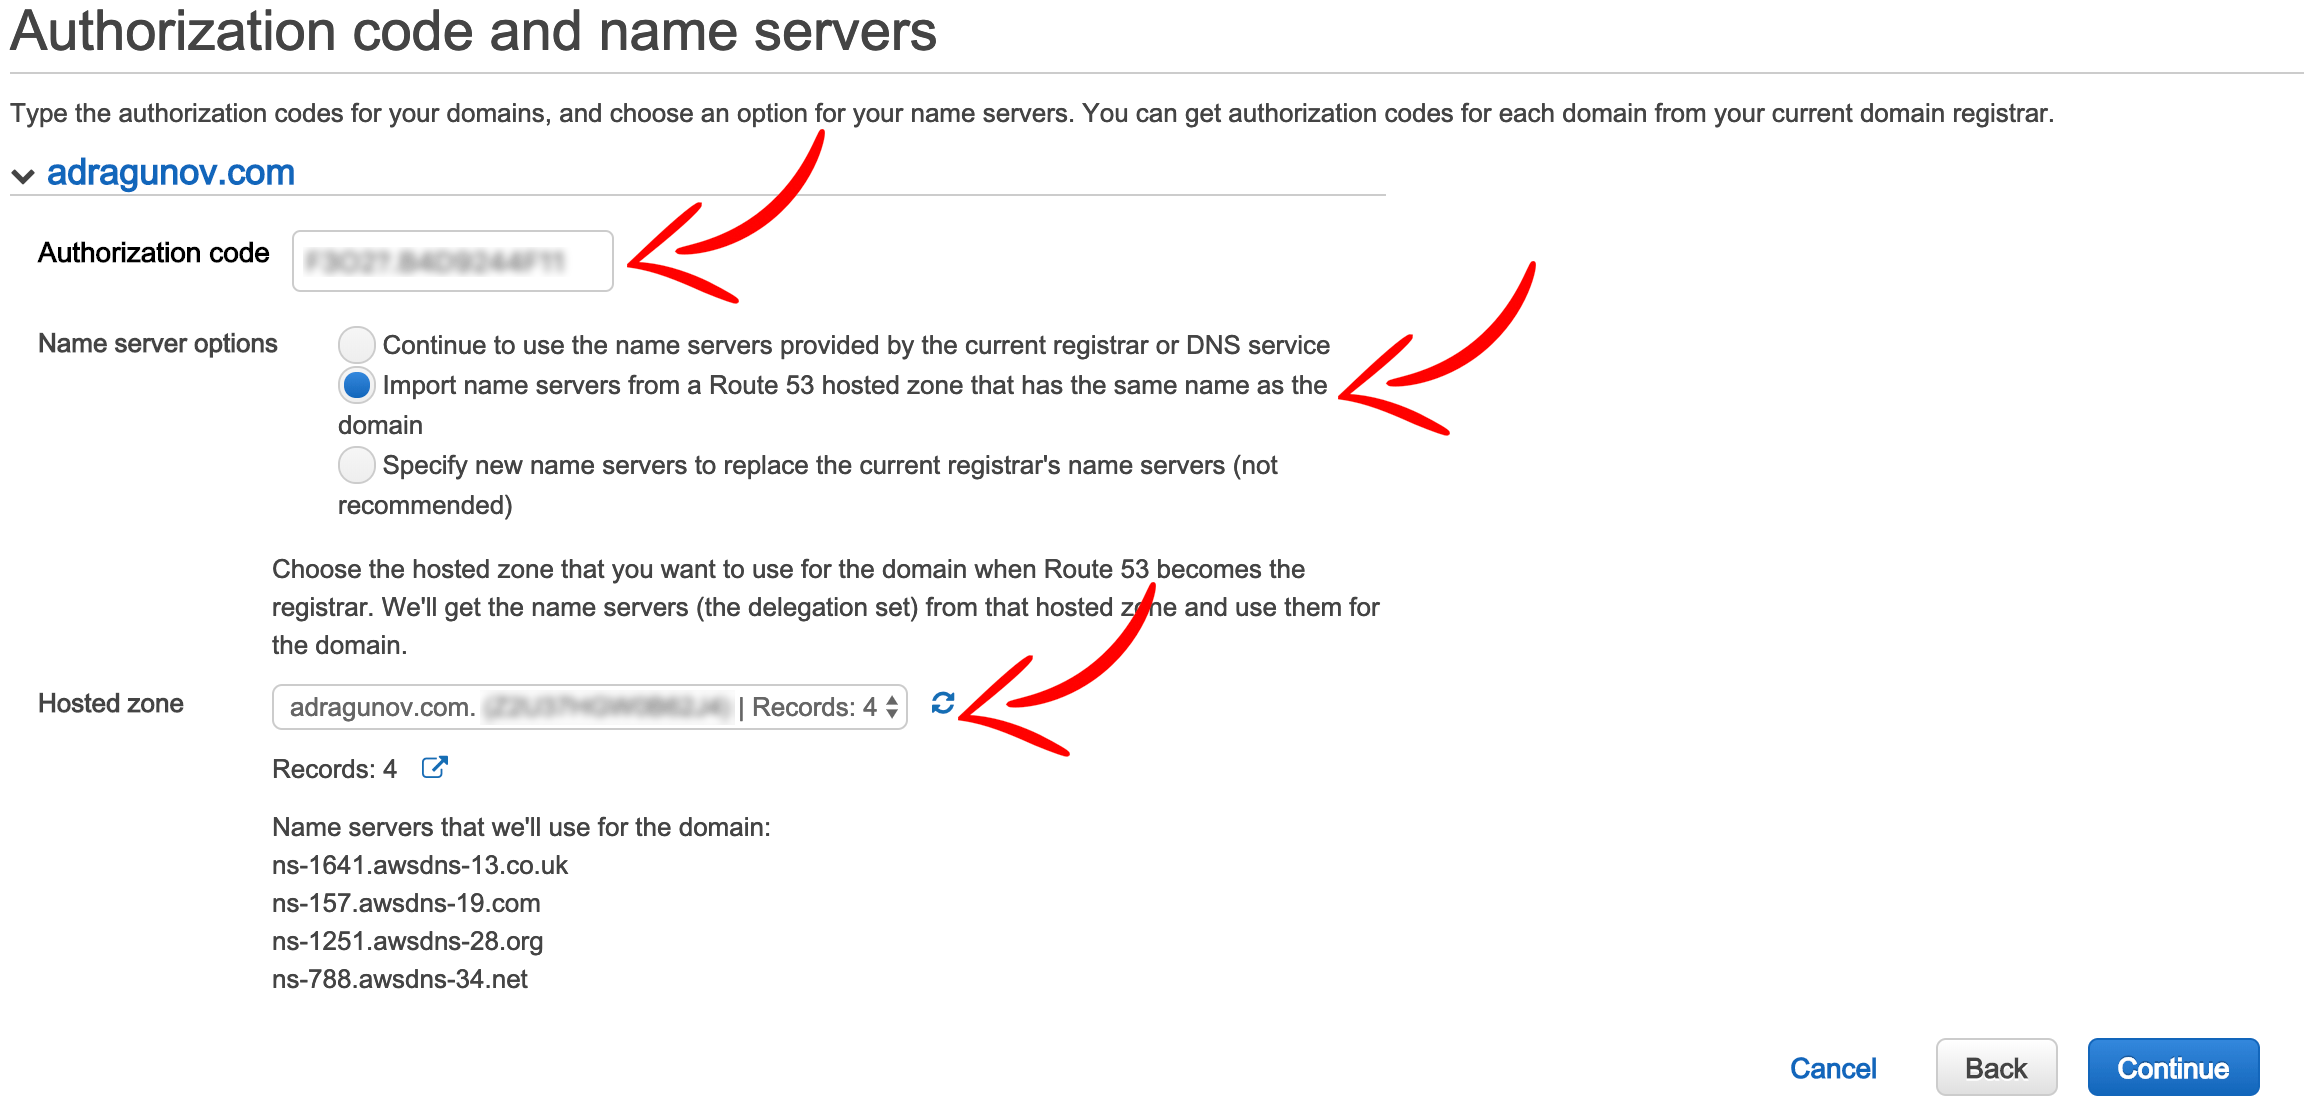
Next enter Authorization code that you have received in the email from GoDaddy. Also under Name server options choose to import name servers from Route 53 hosted zone (as hosted zone is already created and configured before).

Next you will see your domain is listed under Pending requests.

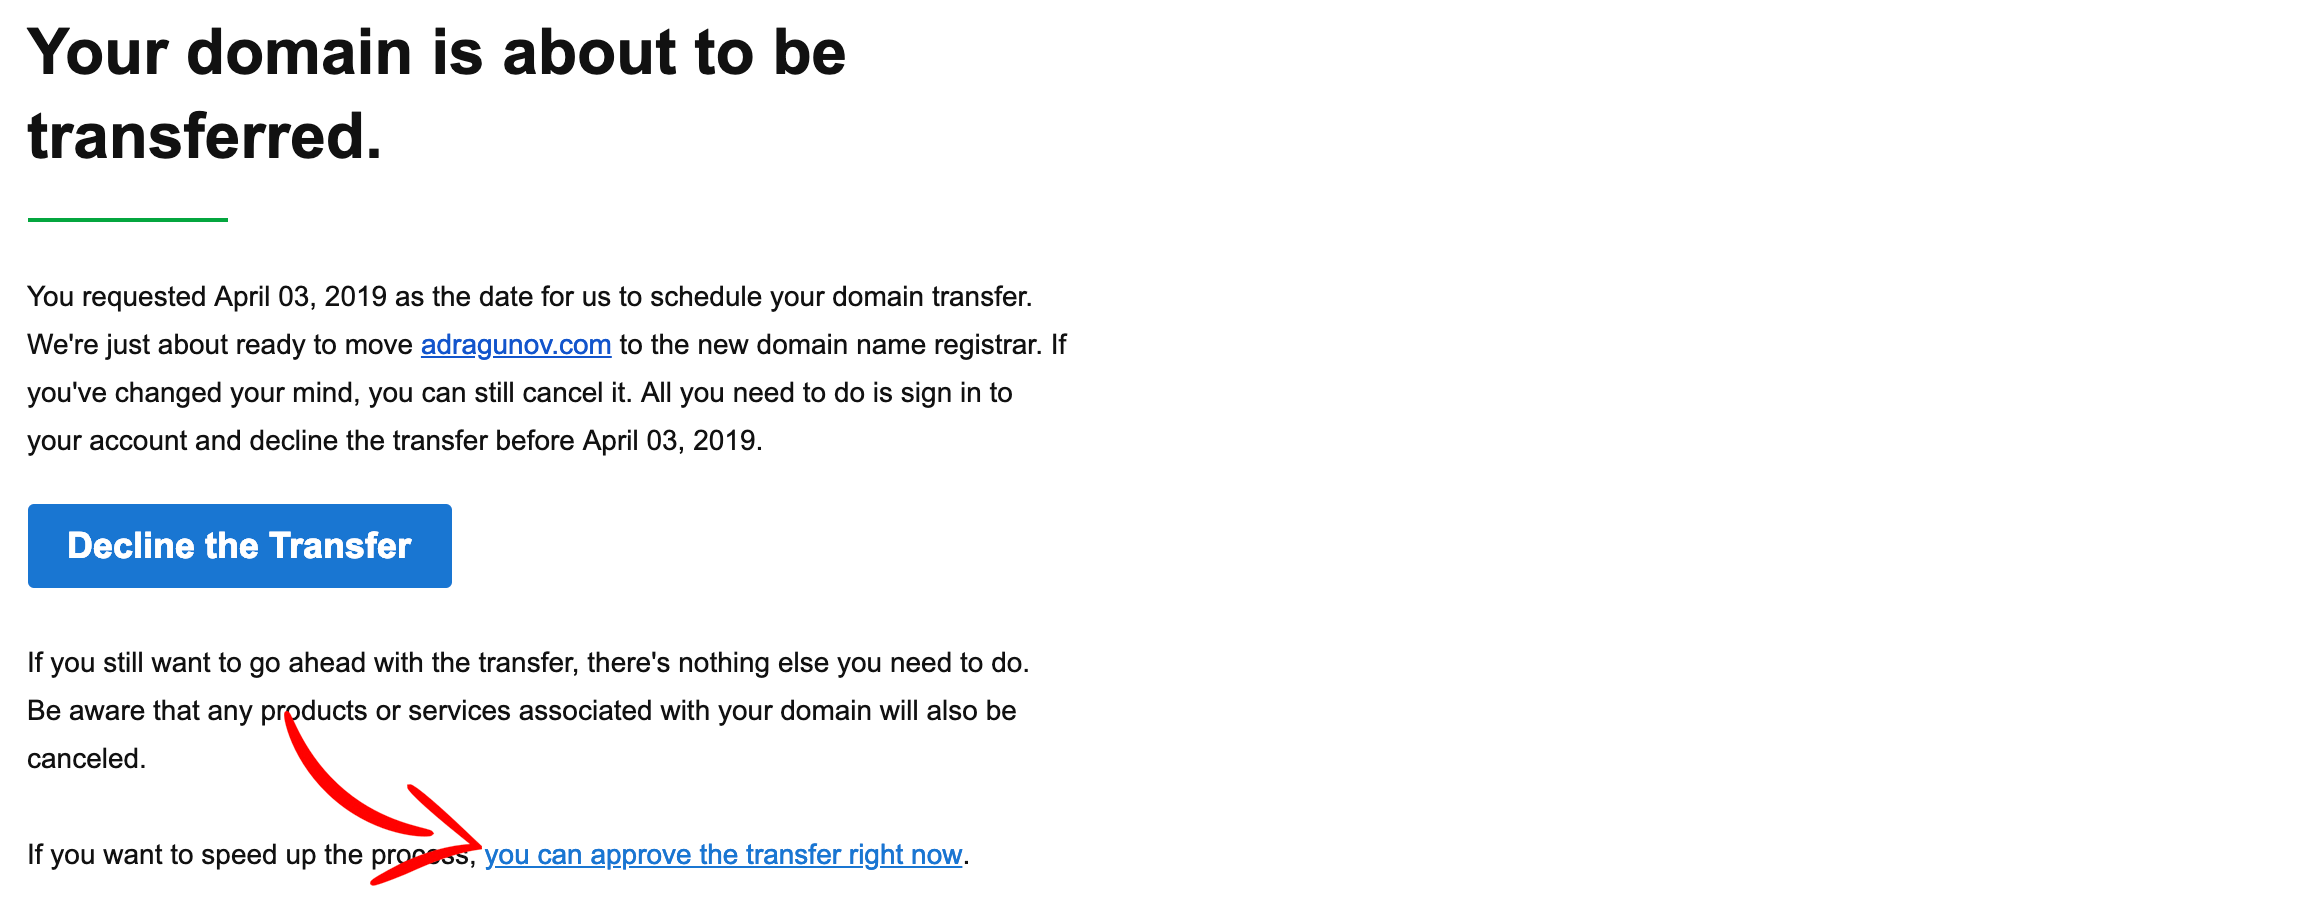
Few minutes later you will get email from GoDaddy that domain is about to be transferred. Click the small link (not big button!) to procees to GoDaddy portal.


In the GoDaddy portal open list of your domains and click Manage. You will see Pending transfer out notification. Click View Details link and accept transfer.


After transfer is accepted, you will receive few more emails from GoDaddy that transfer is complete and they are sorry that you left.

Next you will receive email from Amazon Registrator that you must confirm you email address that you entered in your domain details. Open email and click link to confirm your email address.

Once you confirmed email, your transfer is complete.

So you can verify that everything is fine by checking that your domain is listed under Route 53 Registered domains section.

That is it!
In the next post I will go through the process of setting up static web site using Amazon S3 storage, getting https certificate via AWS Certificate Manager, setting up Amazon CloudFront distribution and connecting all the pieces together.